Plains Indian Tribes: Create a Winter Count
Unfortunately, the Lam Museum doesn’t have a winter count in our collection. However, it seemed like the perfect time of year to learn about and make one. Portions of this post were adapted from South Dakota Public Broadcasting and the National Park Service.
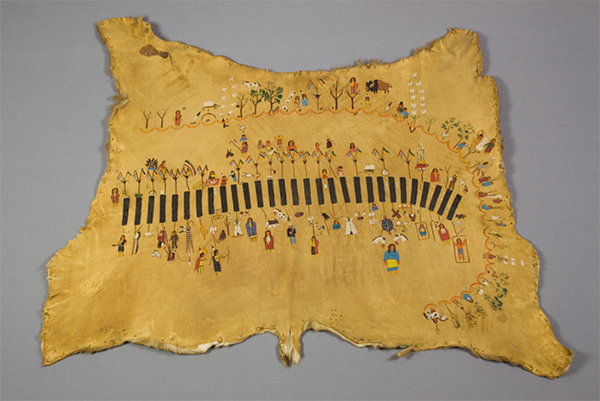
Kiowa winter count on animal hide. Image courtesy of Smithsonian National Museum of Natural History.
Winter counts are pictographic calendars or records of historical and memorable events of a Native American tribe. They were a way of preserving a tribe’s history for future generations. Many Northern Plains tribes like the Blackfeet, Mandan, Kiowa, and Lakota used winter counts extensively.
It was called a winter count because Native Americans didn’t think about or divide time as European people did; a year wasn’t from January to December. Historically, Native Americans counted a year from the first snowfall to the next year’s first snowfall.
Originally, events were recorded on rocks, then tribes began to use buffalo, deer, or cow hides and eventually ledger paper and muslin. Natural dyes made from things like berries, clay, plants, roots, buffalo gall (liver bile), blood, and stomach contents were a few of the materials used to draw the images. The dyes used to record the images also changed over time.

Winter count on cloth, by Long Soldier (Hunkpapa Lakota), ca. 1902. Image courtesy of Smithsonian’s National Museum of the American Indian.
The winter count was so important that each tribe would designate a winter count keeper. Traditionally, the winter count keeper was a man. He was also the historian for the tribe. It was the responsibility of the keeper to provide an oral history of each image drawn on the winter count.
Every winter elders would gather and discuss things that happened throughout the year. They would consult with the keeper to select the most important event of the year. Then the keeper would draw or paint an image on the winter count hide to represent the event. The images on the winter count were used as a reminder to help the keeper remember the events. After the image was completed, the keeper would explain the events in detail. The images on a winter count were arranged in chronological order.
This video from the Cooper Hewitt, Smithsonian Design Museum describes the Lakota tradition of creating winter counts.
Create your own Winter Count!
Remember a winter count is meant to be a record of a specific event or important events from the past year. Your winter count can be about you, your friends, your family, or community. Also, remember that you are creating this record using only images, no words.
You will need:
• Construction, computer, or craft paper, cardstock, butcher paper, large paper bag (paper depends on what size winter count you want to make
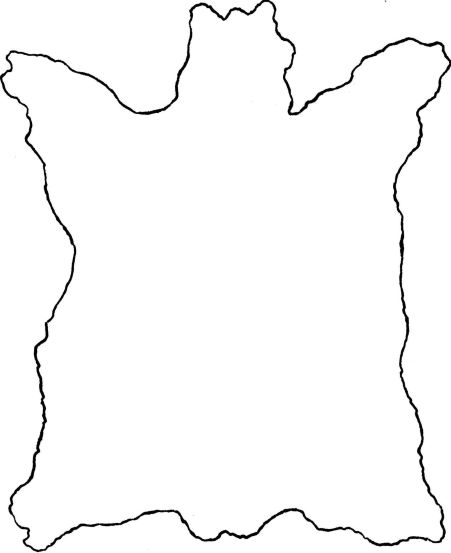
• Buffalo hide template
• Pencil
• Scissors
• Crayons, colored pencils, or markers
Before you make your winter count here are some things to think about:
- Is your winter count about you, your friends, your family, or your community?
- Do you want to have one or multiple events on your winter count?
- What was the most important event or events in your life, your family’s life, and in your community in the past year?
- Why was this event or events so significant?
- Who was affected by the event or events?
- What pictograph (image) will you use/create to depict the event? Remember each event needs an image.
Suggestion: make a list of all the events you might want to include. Think about the images you would use to depict those events. As you think about images to use, you might decide to add, change, or leave off events.
Also, the answer to these questions will help you decide what size winter count you want to make.
Instructions:
- To create a small winter count, use the buffalo hide template and print on cardstock, construction, or computer paper. To create a larger winter count, draw a buffalo hide shape on butcher or craft paper or a large paper bag. If you use a paper bag, cut it open and lay it flat.
- Once you have the size and shape you want, cut it out. Remember the edges are not perfectly cut.
- Option: if you want your buffalo hide to be a tan or brown color you can use that color paper. If you only have white paper, you can use old coffee or tea to stain it a tan color. Watch this video from Montenegro Crafts to see how.
- To decorate your buffalo hide, use a pencil to draw the images you decided on that represent the events you want to remember. If you are drawing multiple images they can go in a circle or in a line.
- Use crayons, markers, or colored pencils to color the images.
- Now you have a winter count!