Ancient Coins: Make Your Own Money!
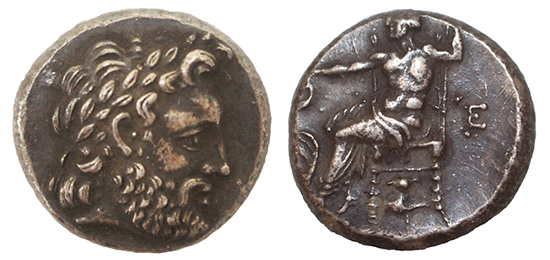
Ancient Greek didrachm
The invention of coins is shrouded in mystery. Coins as we think of them today were first used as a method of payment around the 6th or 5th century BCE. According to the historian Herodotus, King Croesus of Lydia was “the first to strike and use coins of gold and silver.” But, Aristotle claimed that the first coins were minted by the wife of King Midas of Phrygia. We may never know which is true.
However, Lydian staters are widely considered to be the world’s oldest coins. They are made from electrum, a mixture of gold and silver. These early coins were minted around 600 BCE in the kingdom of Lydia in the modern-day country of Turkey. Lydian staters are important because they were the first coins in history to be officially issued by a government body. They were the model for virtually all other coinage.
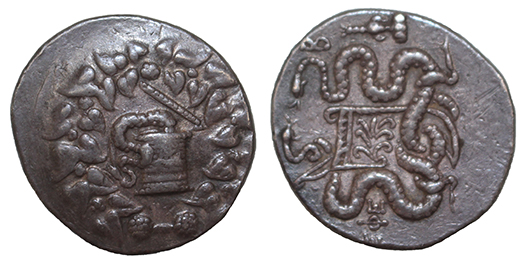
This Greek tetradrachm dates to 200-100 BCE.
In ancient times, there was no standard coinage system. Each kingdom, empire, ruler, and country created their own coins. The coins varied in weight, shape, design, worth, and materials. And coinage changed frequently. This continues to be true today, just think of all the different types of coins around the world.

Chinese coins have had many different shapes over the centuries.
Ancient coins were made from materials that were considered valuable or were easily available including gold, silver, electrum, copper, bronze, brass, iron, or glass. Eventually, gold and silver became the most popular materials used to make coins. Today, most coins are made with some combination of copper, zinc, and nickel.
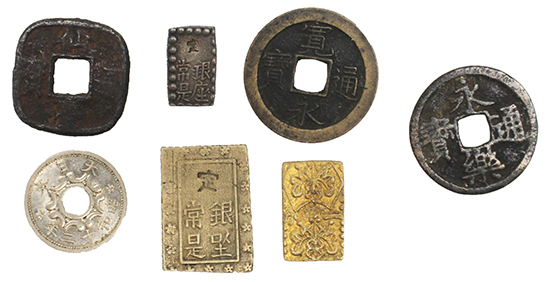
Japanese coins have been minted from many different kinds of metal.
Early coins were usually die stamped, cast, or roughly impressed. Between 550 and 500 BCE, improved minting techniques called in relief and intaglio gradually replaced the roughly impressed designs of earlier coins. These techniques changed the appearance of coins.
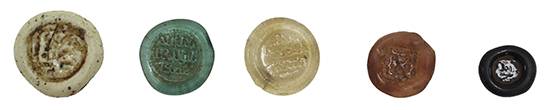
Impressed glass coins from Egypt
Most coins were marked on both sides, but some were only marked on one. Coins were decorated with symbols, images, animals, writing, and iconography which represented religious beliefs, deities, kings, important figures, products, places, and significant events. Coins were not just used as currency but also as a way of telling a story.
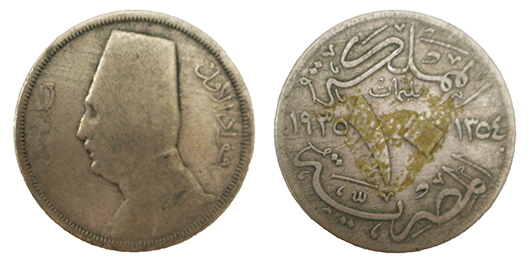
This Egyptian coin from 1950 shows the profile of King Farouk.
Let’s make some coins!
Remember coins can have any type of decoration including faces, flowers, writing, and animals. Also, they can be any color. So be creative when making your own coins! Let them tell something about you.
You can use salt dough for this project. Here’s what you will need to make the dough:
• Flour
• Salt
• Water
• Measuring cup
• Mixing bowl
• Optional: food coloring, tempera paints, watercolor paints
Click here for a video on how to make salt dough.
To make your coins, you will need:
• Air drying clay or salt dough
• Newspaper or craft paper
• Tops from plastic bottles
• Tool with a sharp point (toothpick, wooden skewer, knitting needle)
• Craft paints (whatever colors you would like your coins to be)
• Paintbrushes
• Cup for water (to clean brushes)
• Objects to press into clay for designs (buttons, coins, fork, etc.)
Directions:
- Cover your work space with newspaper or craft paper.
- Roll a piece of air dry clay or salt dough into a ball and then flatten.
- Use a bottle top to cut the clay/dough into a coin shape. Experiment with different size tops for different size coins.
- Decorate your coins by pressing objects into the surface to make designs. Or draw designs with your sharp tool. Be careful not to press or draw too hard or you will tear your coin.
- If using air drying clay, leave the clay to dry. It may take several days depending on the weather and thickness of the clay.
- If using salt dough you can either leave it out to dry or bake it in the oven at 200 degrees. Time in the oven will depend on how thick your dough is, so check it often.
- Once the clay/dough is dry, begin to paint your coins. If you colored your salt dough you may not want to paint your coins. You may want to paint details or put more than one color on your coins. Let each paint color dry before adding another color.
- Once you’ve finished painting your coins, let them dry completely.
- Enjoy your coins!
If you’d like to try making coins using a molding technique, click here for a video by SpecialFx Nerds.
All coins featured in this post are from the MOA collection.